The International Trade Blog ![]() Shipping Solutions Software
Shipping Solutions Software
Using Profile Settings In Shipping Solutions Export Documentation Software (video)
On: March 17, 2015 | By:  Lisa Nemer |
4 min. read
Lisa Nemer |
4 min. read
 Last week’s blog post showed you how to load signature and logo images into Shipping Solutions export software. The most efficient way to make use of those images is by connecting them to a profile.
This week’s blog post shows you how you can use Profile Settings to assign logo and signature images, save your Export Compliance Module user name and password, and provide an email address to AESDirect on the ACE platform for receiving your Internal Transaction Number (ITN).
You can create as many profiles as you need. If you have the single-user version of Shipping Solutions, you can choose a default profile that will automatically be assigned to your shipments. If you have a shipment that requires a different profile, however, you can go to the EZ Start screen and click on Change Shipment Options. Select the desired Profile from the drop-down list.
If you have multiple users of Shipping Solutions, you can assign default profiles to User Accounts. Profiles can be overridden in the same way as with the single-user version. User Accounts will be discussed in a future blog post. For now, check out the video below on Profile Settings.
Transcript of Video:
This video explains how to use Profiles in Shipping Solutions software.
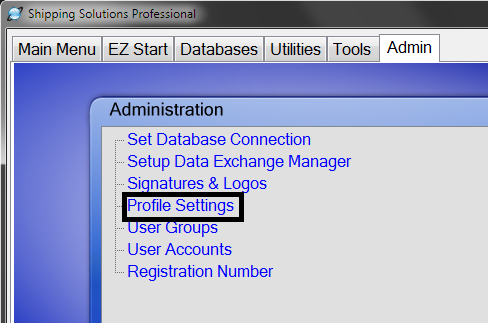
To set-up a profile, click the Admin tab and then click Profile Settings. The default profile is already set-up. If you have the single-user version of Shipping Solutions you can simply modify the data fields on the default profile. If you have the multi-user version of Shipping Solutions you can have all users use the same profile, or you can add additional profiles so that you can assign different profiles to different users.
To add a profile, click the Add new profile button. Give the new profile a name, and I will call it Robert’s profile. Then I can fill in the information that I want to have appear on all of Robert’s shipments.
- In the AES/EEI Email box enter the email address to which the AES server will send email confirmation of a successful AES filing along with the shipment’s ITN number. You can add multiple email addresses if you separate them with commas.
- The next three boxes let you choose images of signatures and logos that will print on certain documents. You simply pull the images from the drop-down list, and a preview will show in the boxes to the right. You can choose a Profile Signature, Company Logo and Freight Forwarder Logo. Watch the Signatures and Logos video to see how to add images to the program so that they will appear in these drop-down lists. The video also has a chart showing which images show up on which documents.
- In the Compliance Login section you can enter the user name and password that allows you to run the Export Compliance Module available in Shipping Solutions Professional, so these boxes will not be visible if you are using Classic. You must have an active Annual Maintenance Program to use the Export Compliance Module. You run the Export Compliance Module by clicking on the Compliance button on the EZ Start tab. You can enter your user name and password directly on that screen, but if you enter it here it will be saved and automatically fill in when you run the Export Compliance Module.
You can create new profiles any time you have a change; for example, a new company logo. Creating a new profile rather than changing an existing profile will keep older shipments intact with their original profiles. If a profile is no longer needed you can check the Inactive Profile box. This is preferable to deleting the profile as it will then remain in effect on any shipments that used the now inactive profile.
To assign a profile to a user, save and close this screen and go to the User Accounts screen. Let’s create a User Account for Robert Johnson, so I’ll click Add New and enter his user name and password. We will assign him to the Admin Group and give him his new profile.
We can then go to the EZ Start tab and create a new shipment. Looking at the shipment summary we can see that this shipment has his profile. We can also change the profile by clicking on Change Shipment Options. Choose the Profile you want from the drop-down list.
This concludes the Profile Settings video. Thank you for watching!